Terrible Cell Signal at Home? Siri Shortcuts App can Help Save Battery and Phone Calls

If you have little or no cellular connection at your home or work location, you’ve probably noticed your battery life is poor and your phone may not switch to Wi-Fi calling, resulting in dropped calls. By using a combination of Siri shortcuts and automations, you can set it up so that anytime you arrive at a particular location, your phone will go into airplane mode but stay connected to Wi-Fi. When your phone is in airplane mode with Wi-Fi on, you’ll still receive calls and texts through the “Wi-Fi Calling” feature. Using the same tools, you can also have your phone automatically turn off airplane mode when you leave that location. It only takes about 5 minutes to set up these Siri tricks!

To get started, you’ll need to create two Siri shortcuts: one to turn on airplane mode and then turn Wi-Fi back on when you arrive at your home, and another to turn off airplane mode when you leave.

Create Two Shortcuts to Turn On and Off Airplane Mode

To get started open up the Shortcuts app if you don’t know where that is, you can pull down to search on your phone home screen and type in the word “shortcuts”. The basic steps are below, click the section to open more detailed instructions if you need the details.

First, create a shortcut called “Set Airplane Mode ON” to turn ON Airplane Mode and Wi-Fi. You’ll create the shortcut using the “Set Airplane Mode” and “Set Wi-Fi” actions, turning both on.
  1. Open the Shortcuts app on your iPhone.
  2. Tap the “+” icon in the top right corner to create a new shortcut.
  3. Tap “Add Action.”
  4. In the search bar, type “Set Airplane Mode” and select it from the list.
  5. Set the toggle to “Turn” and choose “On” for Airplane Mode.
  6. Tap the “+” button below the Airplane Mode action to add another action.
  7. In the search bar, type “Set Wi-Fi” and select it from the list.
  8. Set the toggle to “Turn” and choose “On” for Wi-Fi.
  9. Tap “Next” in the top right corner.
  10. Click on name at the top and rename to “Set Airplane Mode ON”.
  11. Tap “Done” to save your shortcut.
Next, create shortcut called “Set Airplane Mode OFF” to turn Off Airplane Mode and Wi-Fi. Create the shortcut using the “Set Airplane Mode” action (turn off).
  1. Open the Shortcuts app on your iPhone.
  2. Tap the “+” icon in the top right corner to create a new shortcut.
  3. Tap “Add Action.”
  4. In the search bar, type “Set Airplane Mode” and select it from the list.
  5. Set the toggle to “Turn” and choose “Off” for Airplane Mode.
  6. Tap “Next” in the top right corner.
  7. Click on name at the top and rename to “Set Airplane Mode OFF.”
  8. Tap “Done” to save your shortcut.

Once you’re done you should have two shortcuts (search for Airplane). You can click on them to try them out. The next step is to run these automatically when you leave or arrive at your home location.

Create Two Automations for Arriving and Leaving Home

First, Create Automation to Run when Arrive Home. You’ll create an “Arrive” trigger that will run your “Set Airplane Mode ON” shortcut.
  1. Open the Shortcuts app on your iPhone and tap the “Automation” tab at bottom.
  2. Tap the ”+” icon in the top right corner to create a new automation.
  3. Choose “Arrive” from the list of triggers.
  4. Tap “Choose” next to Location and select your current location by tapping “Current Location” in the search bar. bar (you may be prompted to give permission).
  5. Tap “Done” once your location is set.
  6. Change the option to “Run Immediately” instead of the default.
  7. Tap “Next.”
  8. Tap on “My Shortcuts>” and choose “Set Airplane Mode ON” from your list of shortcuts. 
Next, create an automation to run when leave home. You’ll create a “Leave” trigger that will run your “Set Airplane Mode OFF” shortcut .
  1. Open the Shortcuts app on your iPhone and tap the “Automation” tab at bottom.
  2. Tap the ”+” icon in the top right corner to create a new automation.
  3. Choose “Leave” from the list of triggers.
  4. Tap “Choose” next to Location and select your current location by tapping “Current Location” in the search bar (you may be prompted to give permission).
  5. Tap “Done” once your location is set.
  6. Change the option to “Run Immediately” instead of the default.
  7. Tap “Next.”
  8. Tap on “My Shortcuts>” and choose “Set Airplane Mode OFF” from your list of shortcuts. 

Test out Your New Automation

Now it is time to go for a drive or walk and test your setup. Once you get a block from your home location you’ll get a notification your shortcut has run and Airplane mode should be off now. When you return to your home location, you’ll get a notification your automation has run and Airplane mode will be on and your Wi-Fi should be working! 

That’s all you need, but read more below if need help with Wi-Fi calling.

Still have trouble with Wi-Fi calling?

 There are couple of things I’ve had success with.

If you still have trouble with Wi-Fi calling I highly recommend you turn toggle it on / off.
  1. Open the Settings app on your iPhone.
  2. Scroll down and tap Phone.
  3. Tap Wi-Fi Calling.
  4. Toggle Wi-Fi Calling on This iPhone to On or Off, depending on your preference.
  5. If turning on Wi-Fi Calling for the first time, you may be prompted to enter or confirm your emergency address.
If you still have trouble with Wi-Fi calling I would go to reset and reset your network settings. NOTE: This will delete your Wi-Fi passwords!
  1.  Open the Settings app on your iPhone.
  2.  Scroll down and tap General.
  3.  Scroll to the bottom and tap Reset or Transfer or Reset iPhone (depending on your iOS version).
  4.  Tap Reset.
  5.  From the menu that appears, select Reset Network Settings.
  6.  Enter your passcode if prompted.
  7.  Confirm by tapping Reset Network Settings again in the popup.
  8.  Your iPhone will restart, and all network settings (Wi-Fi, Bluetooth, VPN, etc.) will be reset to their default configurations.

Goodbye HostGator, Hello GeekStorage

After a decade plus (or longer) using HostGator they doubled my monthly costs with no notification, messed up my account in management tool so I couldn’t see invoices (convenient …). This is a “test post” on the new server to test out things! I can’t say how easy and fast it was to make the move and highly recommend https://www.geekstorage.com!

Better Kaltura Java API Bindings

I recently had a need to write some code for the Kaltura API and the libraries have had a lot of changes since the last time I used them. One thing I found curious was (at least for Java) all API calls are queued making the operation asynchronous. It’s interesting to me that other languages don’t default to this. This may be desirable in some scenarios; however, if you are wanting to take any conditional action, you iI recently had a need to write some code for the Kaltura API, and the libraries have had a lot of changes since the last time I used them. One thing I found curious was that (at least for Java), all API calls are queued, making the operations all asynchronous. It’s interesting to me that other languages don’t default to this. This may be desirable in some scenarios; however, if you are wanting to take any conditional action, you ideally want to wait for the operation to complete. For example, if you want to iterate through the categories and then, depending on the data, take other actions to generate a report, you’re forced to store all the content in memory before processing it. Perhaps you’d prefer to generate your API session ID by logging in rather than using your admin secret, which is highly recommended. The C# examples show all the code using the execute() method with an onComplete method that sets a boolean. The following line after the call does a loop on the boolean with 100 ms of sleep. I’m not sure if the C# API has a queue method; if it does, it seems the developer portal-generated code is wrong and the polling is not required. While I couldn’t find any examples of serial execution of requests in Java, the executor class does have an “execute” method. You just need to massage the code generated by the API tool a bit. It does block until API calls are complete and then returns.

Here is an example of login:

LoginByLoginIdUserBuilder requestBuilder = UserService.loginByLoginId(loginId, password, partnerId, expiry, privileges, otp)
        .setCompletion(new OnCompletion<Response<String>>() {
            @Override
            public void onComplete(Response<String> result) {
                System.out.println(result);
            }
        });

    APIOkRequestsExecutor.getExecutor().queue(requestBuilder.build(client));

// proceed to other API interactions

Obviously you need addition controls here (like C# samples) to know when the request is actually complete prior to doing other API actions. You can rewrite this call to block on completion. This simplifies your code if you have nested logic that iterates through a list of items (each which generate an API call).

Generated Sample Code

LoginByLoginIdUserBuilder requestBuilder = 
 UserService.loginByLoginId(loginId, password, partnerId, expiry, privileges, otp)
        .setCompletion(new OnCompletion<Response<String>>() {
            @Override
            public void onComplete(Response<String> result) {
                System.out.println(result);
            }
        });

    APIOkRequestsExecutor.getExecutor().queue(requestBuilder.build(client));


My Revised Code

LoginByLoginIdUserBuilder userRequestBuilder = UserService.loginByLoginId(loginId, password, partnerId, 86400, "","");
Response <String> userResult = (Response <String>) APIOkRequestsExecutor.getExecutor().execute(userRequestBuilder.build(client));
String ks = userResult.results.toString();

I think the usage pattern is a lot easier, and the code is much more straightforward.

Unfortunately, it seems the code examples, most of the client API, and documentation for the Kaltura developer portal are all code-generated. This allows them to spend less time supporting them, but honestly, I think using the REST endpoints is easier due to the lack of human-readable documents and proper code examples that are tested.

DIY Standing Desk

If you work at your desk all day without getting up and moving around regularly, you’re not doing your body any favors! In the last couple years, I’ve tried moving around more while on conference calls and sitting in different locations (which is really easy at home, but in our new collaboration spaces at work it’s super easy too). Last year, while in the office, I used one of the sit/stand desks. I was surprised that after using it for an hour in stand position, I was still standing without a desire to sit (from my feet or my brain). I felt more focused standing, and when my feet and back told me it was time for the chair, I did it long enough to feel rested and did more standing. I didn’t like that the sit/stand desk had no keyboard tray, but it did go pretty low, so it wasn’t an ergonomic disaster-just not quite optimal.

The next day, I started researching buying a desk for home and found it’s pretty easy to spend between $600-900. I’m a person that always likes to make things my own, whether that involves customizing them or building them. I started looking for options to build a desk from a frame, and it turns out a few companies offer their desks without the top for people like me. I searched quite a bit to find a desk that could handle a decent weight, had good reviews online, and more than a 90-day warranty. After a lot of searching, I found a deal on Amazon. It was the… It was on sale for $279 and had an extra 20% cash back. I ordered it Friday and it appeared Sunday morning! I wasn’t ready with a top, so I cut a bit off a piece of plywood in my leftover stack in the garage to use in the meantime.

IMG_1508

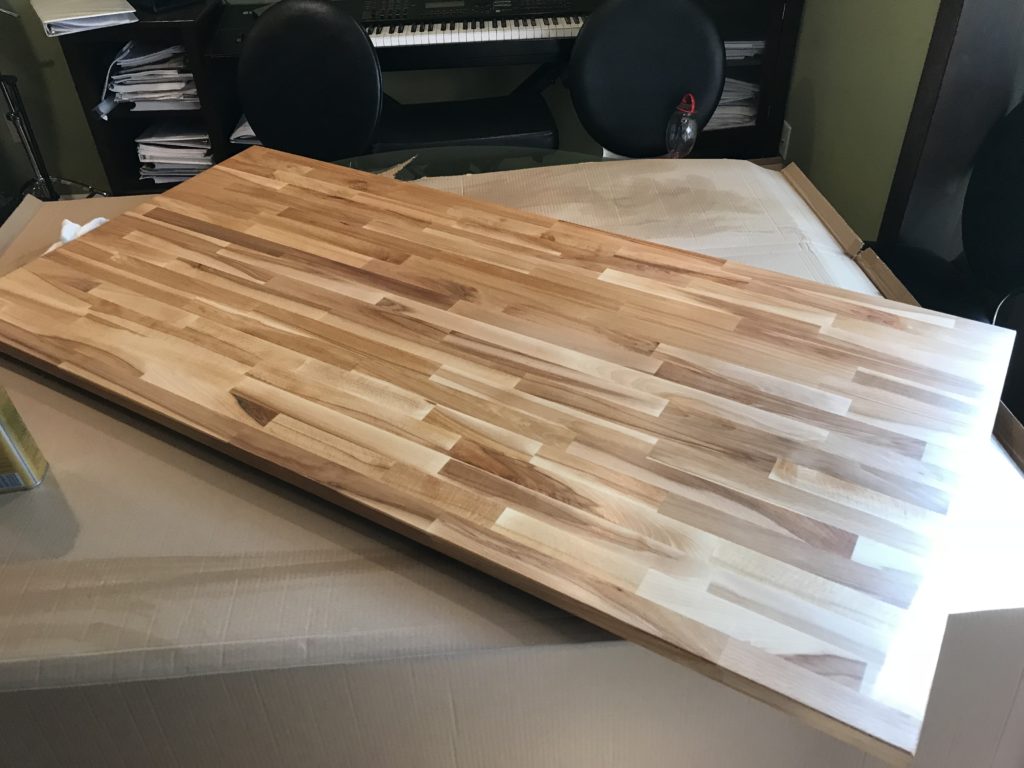
IKEA Top with four coats of wipe-on poly

For the top, I wanted to go big. My current desk in my home office was a standard computer desk, about 4 feet wide and 20 or so inches deep. Most the ones online offered a 30×60 size which sounded amazing. I wanted a nice clean look – something with some nice grain patterns, not dark. I found my local IKEA store sold an unfinished solid wood butcher block top. I put three coats of poly on it to make the wood colors pop without a glassy finish. It was simple to mount (like < 30 minutes) and then I just had to attach the controls to the front of the desk. I found a great standing pad that I stick under the desk when standing and it’s worked out great. I found generally I like to stand 2-4 times a day for 45-60 minutes. I think that’s a great compromise for an information worker and I think the look turned out great.

IMG_1509

Since the picture above, I 3D printed some cable management guides, mounted the power supply, and printed an under mount hook for my over the ear headphones (I call them the focus-phones)

Here are the parts I went with if you want to follow my path. The total for everything was under $400.

Using OctoPi with USB Camera

OctoPrint is an amazing little app with a simple web interface that controls your 3D printer. It has the ability to manage your gcode files or even take STL files and “slice” them into gcode files (which I’d never use since I like to visualize the layering in a tool first). OctoPi is a Raspberry Pi distribution of the tool that runs on the Pi. I had an older Raspberry Pi B that was perfect to throw at my need to remote control/monitor my longer 3D prints.

FullSizeRender 17

View of interface on iPhone

Disclaimer: I know the Raspberry Pi camera using the camera interface is “the way to go”. But an older camera you have (or $5 Playstation Eye camera) is worth a try right? No way, CPU will be too high, you won’t have enough USB ports, system will run too hot, will cause printing to pause … or will it?

The way OctoPrint integrates with a camera is by pulling into its page a video stream from mjpg_streamer (a web server running on a different port). This tool takes content from your web camera and creates a web video stream.  This software is distributed with the OctoPi build, no extra install required. Building the stream is a much more efficient if your camera is newer and has support for MJPG – otherwise you’re using YUYV encoding and the Pi has to do a lot of extra work. Nevertheless you can make this work. I use the following options to run the streamer:

./mjpg_streamer -i "input_uvc.so -f 1 -q 50 -y -r 640x480" -o "output_http.so -w ./www"

The important parameters above is the “-f 1” which says do one frame per second (I’m not looking for high quality video – I just want to see if print has lifted and get a feel of progress). The “-q 50″ controls quality of the result compression.

You can update settings in /boot/octopi.txt so these are used by default. This can be done by ssh to your machine or shut the machine down and edit the file on your computer after putting in the SD card.

camera_usb_options=”-f 1 -q 75 -y”

The advantage of changing the settings in the boot config file is every time you unplug the camera the process dies, and when it starts it will use this setting (there is a background process called “webcam” that handles this).

I tried changing the resolution and surprisingly  didn’t find a change in CPU usage so opted to keep it. As far as CPU, the system is running high at 85% and most of that usage is from the mjpg_streamer process.

Command to check temperature:
vcgencmd measure_temp

So yes, it runs the CPU pretty high (80%+) and the temperatures run a few degrees higher (but at 54’C well below limits), and the initial OctoPrint interface loads a bit slower. If you don’t want to spend money on a $30 Pi camera or a more expensive USB camera I think you can make it work.

Useful Documentation Page on Settings per Camera