Recently stumbled on the post “Friction Was the Feature” by Ethan Johnstone and it really stuck with me. Worth reading here.
Roughly his point is writing something good used to take real effort, and that effort had unique value to people “consuming” the writing. A well-written application or pitch meant somebody cared enough to put in the time or had the “skill”. Now that AI can produce “pretty good” almost instantly or with enough iterations, that signal is gone. Everything looks fine (sort of). It’s harder to tell who’s actually good anymore based on the general quality of what they created.
It first reminded me of pitch decks honestly. A genuinely high quality presentation used to be a decent way to filter out the consultants and businesses who didn’t know what they were doing, mostly because faking that level of polish took almost as much work as actually being good. Big consultant companies probably re-used these pitch decks (often forgetting to change client names) because of how they “signaled” depth and readiness to the client.
Really the same thing applies to code. Writing clean, well tested, maintainable code was hard enough that being able to do it consistently gave you an indication of skill and confidence in a code base. Junk code that only worked on the happy path of execution was a signal of a problem.
That’s not as evident anymore. AI can write code that looks clean and passes the tests without anyone involved fully understanding why it works, including the person who technically wrote it. The quality bar didn’t go away, just stopped implying the same thing. I guess the old expression of “buyer beware” is more true than ever when we can’t rely on the same filters to evaluate the value of things.
Today was my last day of more than 30 years in corporate IT software development work!
My first gig was writing Pascal and x86 assembly language at a nuclear fuel plant called Combustion Engineering. Fun and interesting job with ironic company name given all safety rules to avoid a criticality accident. From there I spent a few years at a railroad doing mainframe assembly (and bit of COBOL). Wasn’t prepared for that job, I remember first day asking why there were two enter keys. Eventually moved into client-server systems written in C.
After that worked for the “local phone company”. Early on I worked on a cross-platform, message-oriented middleware tool that ran on PCs, mainframes, and every flavor of Unix. It was over 30 years old and still running in a few places when I beat it to company retirement. One of my favorite projects from that era was a VOIP prototype. PC client and a phone-line interface card initiating voice calls over the regular phone network before we all used the word “Skype”.
Later I moved into enterprise architecture, rolling out Java-based tools and teaching web development classes I really enjoyed. I’d love to teach again, but that space is shrinking due to AI. I also helped build an internal collaboration platform – including the odd experience of watching legal shut it down one Friday evening, and couple years later helping the CEO start his own blog.
The last few years started to feel like a dark “Black Mirror” edition of Dilbert with knee-jerk culture changes, relocations, and general silliness. In the book The Hitchhiker’s Guide to the Galaxy, Earth is doomed because it’s in the way of a hyperspace bypass. The dolphins know it’s coming and try to warn humanity, unfortunately their warnings get mistaken for tricks performed for fish. Eventually they leave Earth with a farewell message: “So long, and thanks for all the fish.”
Time to swim off toward something more self-directed. So long, and thanks for all the fish!
If you have little or no cellular connection at your home or work location, you’ve probably noticed your battery life is poor and your phone may not switch to Wi-Fi calling, resulting in dropped calls. By using a combination of Siri shortcuts and automations, you can set it up so that anytime you arrive at a particular location, your phone will go into airplane mode but stay connected to Wi-Fi. When your phone is in airplane mode with Wi-Fi on, you’ll still receive calls and texts through the “Wi-Fi Calling” feature. Using the same tools, you can also have your phone automatically turn off airplane mode when you leave that location. It only takes about 5 minutes to set up these Siri tricks!
To get started, you’ll need to create two Siri shortcuts: one to turn on airplane mode and then turn Wi-Fi back on when you arrive at your home, and another to turn off airplane mode when you leave.
Create Two Shortcuts to Turn On and Off Airplane Mode
To get started open up the Shortcuts app if you don’t know where that is, you can pull down to search on your phone home screen and type in the word “shortcuts”. The basic steps are below, click the section to open more detailed instructions if you need the details.
First, create a shortcut called “Set Airplane Mode ON” to turn ON Airplane Mode and Wi-Fi. You’ll create the shortcut using the “Set Airplane Mode” and “Set Wi-Fi” actions, turning both on.
Open the Shortcuts app on your iPhone.
Tap the “+” icon in the top right corner to create a new shortcut.
Tap “Add Action.”
In the search bar, type “Set Airplane Mode” and select it from the list.
Set the toggle to “Turn” and choose “On” for Airplane Mode.
Tap the “+” button below the Airplane Mode action to add another action.
In the search bar, type “Set Wi-Fi” and select it from the list.
Set the toggle to “Turn” and choose “On” for Wi-Fi.
Tap “Next” in the top right corner.
Click on name at the top and rename to “Set Airplane Mode ON”.
Tap “Done” to save your shortcut.
Next, create shortcut called “Set Airplane Mode OFF” to turn Off Airplane Mode and Wi-Fi. Create the shortcut using the “Set Airplane Mode” action (turn off).
Open the Shortcuts app on your iPhone.
Tap the “+” icon in the top right corner to create a new shortcut.
Tap “Add Action.”
In the search bar, type “Set Airplane Mode” and select it from the list.
Set the toggle to “Turn” and choose “Off” for Airplane Mode.
Tap “Next” in the top right corner.
Click on name at the top and rename to “Set Airplane Mode OFF.”
Tap “Done” to save your shortcut.
Once you’re done you should have two shortcuts (search for Airplane). You can click on them to try them out. The next step is to run these automatically when you leave or arrive at your home location.
Create Two Automations for Arriving and Leaving Home
First, Create Automation to Run when Arrive Home. You’ll create an “Arrive” trigger that will run your “Set Airplane Mode ON” shortcut.
Open the Shortcuts app on your iPhone and tap the “Automation” tab at bottom.
Tap the ”+” icon in the top right corner to create a new automation.
Choose “Arrive” from the list of triggers.
Tap “Choose” next to Location and select your current location by tapping “Current Location” in the search bar. bar (you may be prompted to give permission).
Tap “Done” once your location is set.
Change the option to “Run Immediately” instead of the default.
Tap “Next.”
Tap on “My Shortcuts>” and choose “Set Airplane Mode ON” from your list of shortcuts.
Next, create an automation to run when leave home. You’ll create a “Leave” trigger that will run your “Set Airplane Mode OFF” shortcut .
Open the Shortcuts app on your iPhone and tap the “Automation” tab at bottom.
Tap the ”+” icon in the top right corner to create a new automation.
Choose “Leave” from the list of triggers.
Tap “Choose” next to Location and select your current location by tapping “Current Location” in the search bar (you may be prompted to give permission).
Tap “Done” once your location is set.
Change the option to “Run Immediately” instead of the default.
Tap “Next.”
Tap on “My Shortcuts>” and choose “Set Airplane Mode OFF” from your list of shortcuts.
Test out Your New Automation
Now it is time to go for a drive or walk and test your setup. Once you get a block from your home location you’ll get a notification your shortcut has run and Airplane mode should be off now. When you return to your home location, you’ll get a notification your automation has run and Airplane mode will be on and your Wi-Fi should be working!
That’s all you need, but read more below if need help with Wi-Fi calling.
Still have trouble with Wi-Fi calling?
There are couple of things I’ve had success with.
If you still have trouble with Wi-Fi calling I highly recommend you turn toggle it on / off.
Open the Settings app on your iPhone.
Scroll down and tap Phone.
Tap Wi-Fi Calling.
Toggle Wi-Fi Calling on This iPhone to On or Off, depending on your preference.
If turning on Wi-Fi Calling for the first time, you may be prompted to enter or confirm your emergency address.
If you still have trouble with Wi-Fi calling I would go to reset and reset your network settings. NOTE: This will delete your Wi-Fi passwords!
Open the Settings app on your iPhone.
Scroll down and tap General.
Scroll to the bottom and tap Reset or Transfer or Reset iPhone (depending on your iOS version).
Tap Reset.
From the menu that appears, select Reset Network Settings.
Enter your passcode if prompted.
Confirm by tapping Reset Network Settings again in the popup.
Your iPhone will restart, and all network settings (Wi-Fi, Bluetooth, VPN, etc.) will be reset to their default configurations.
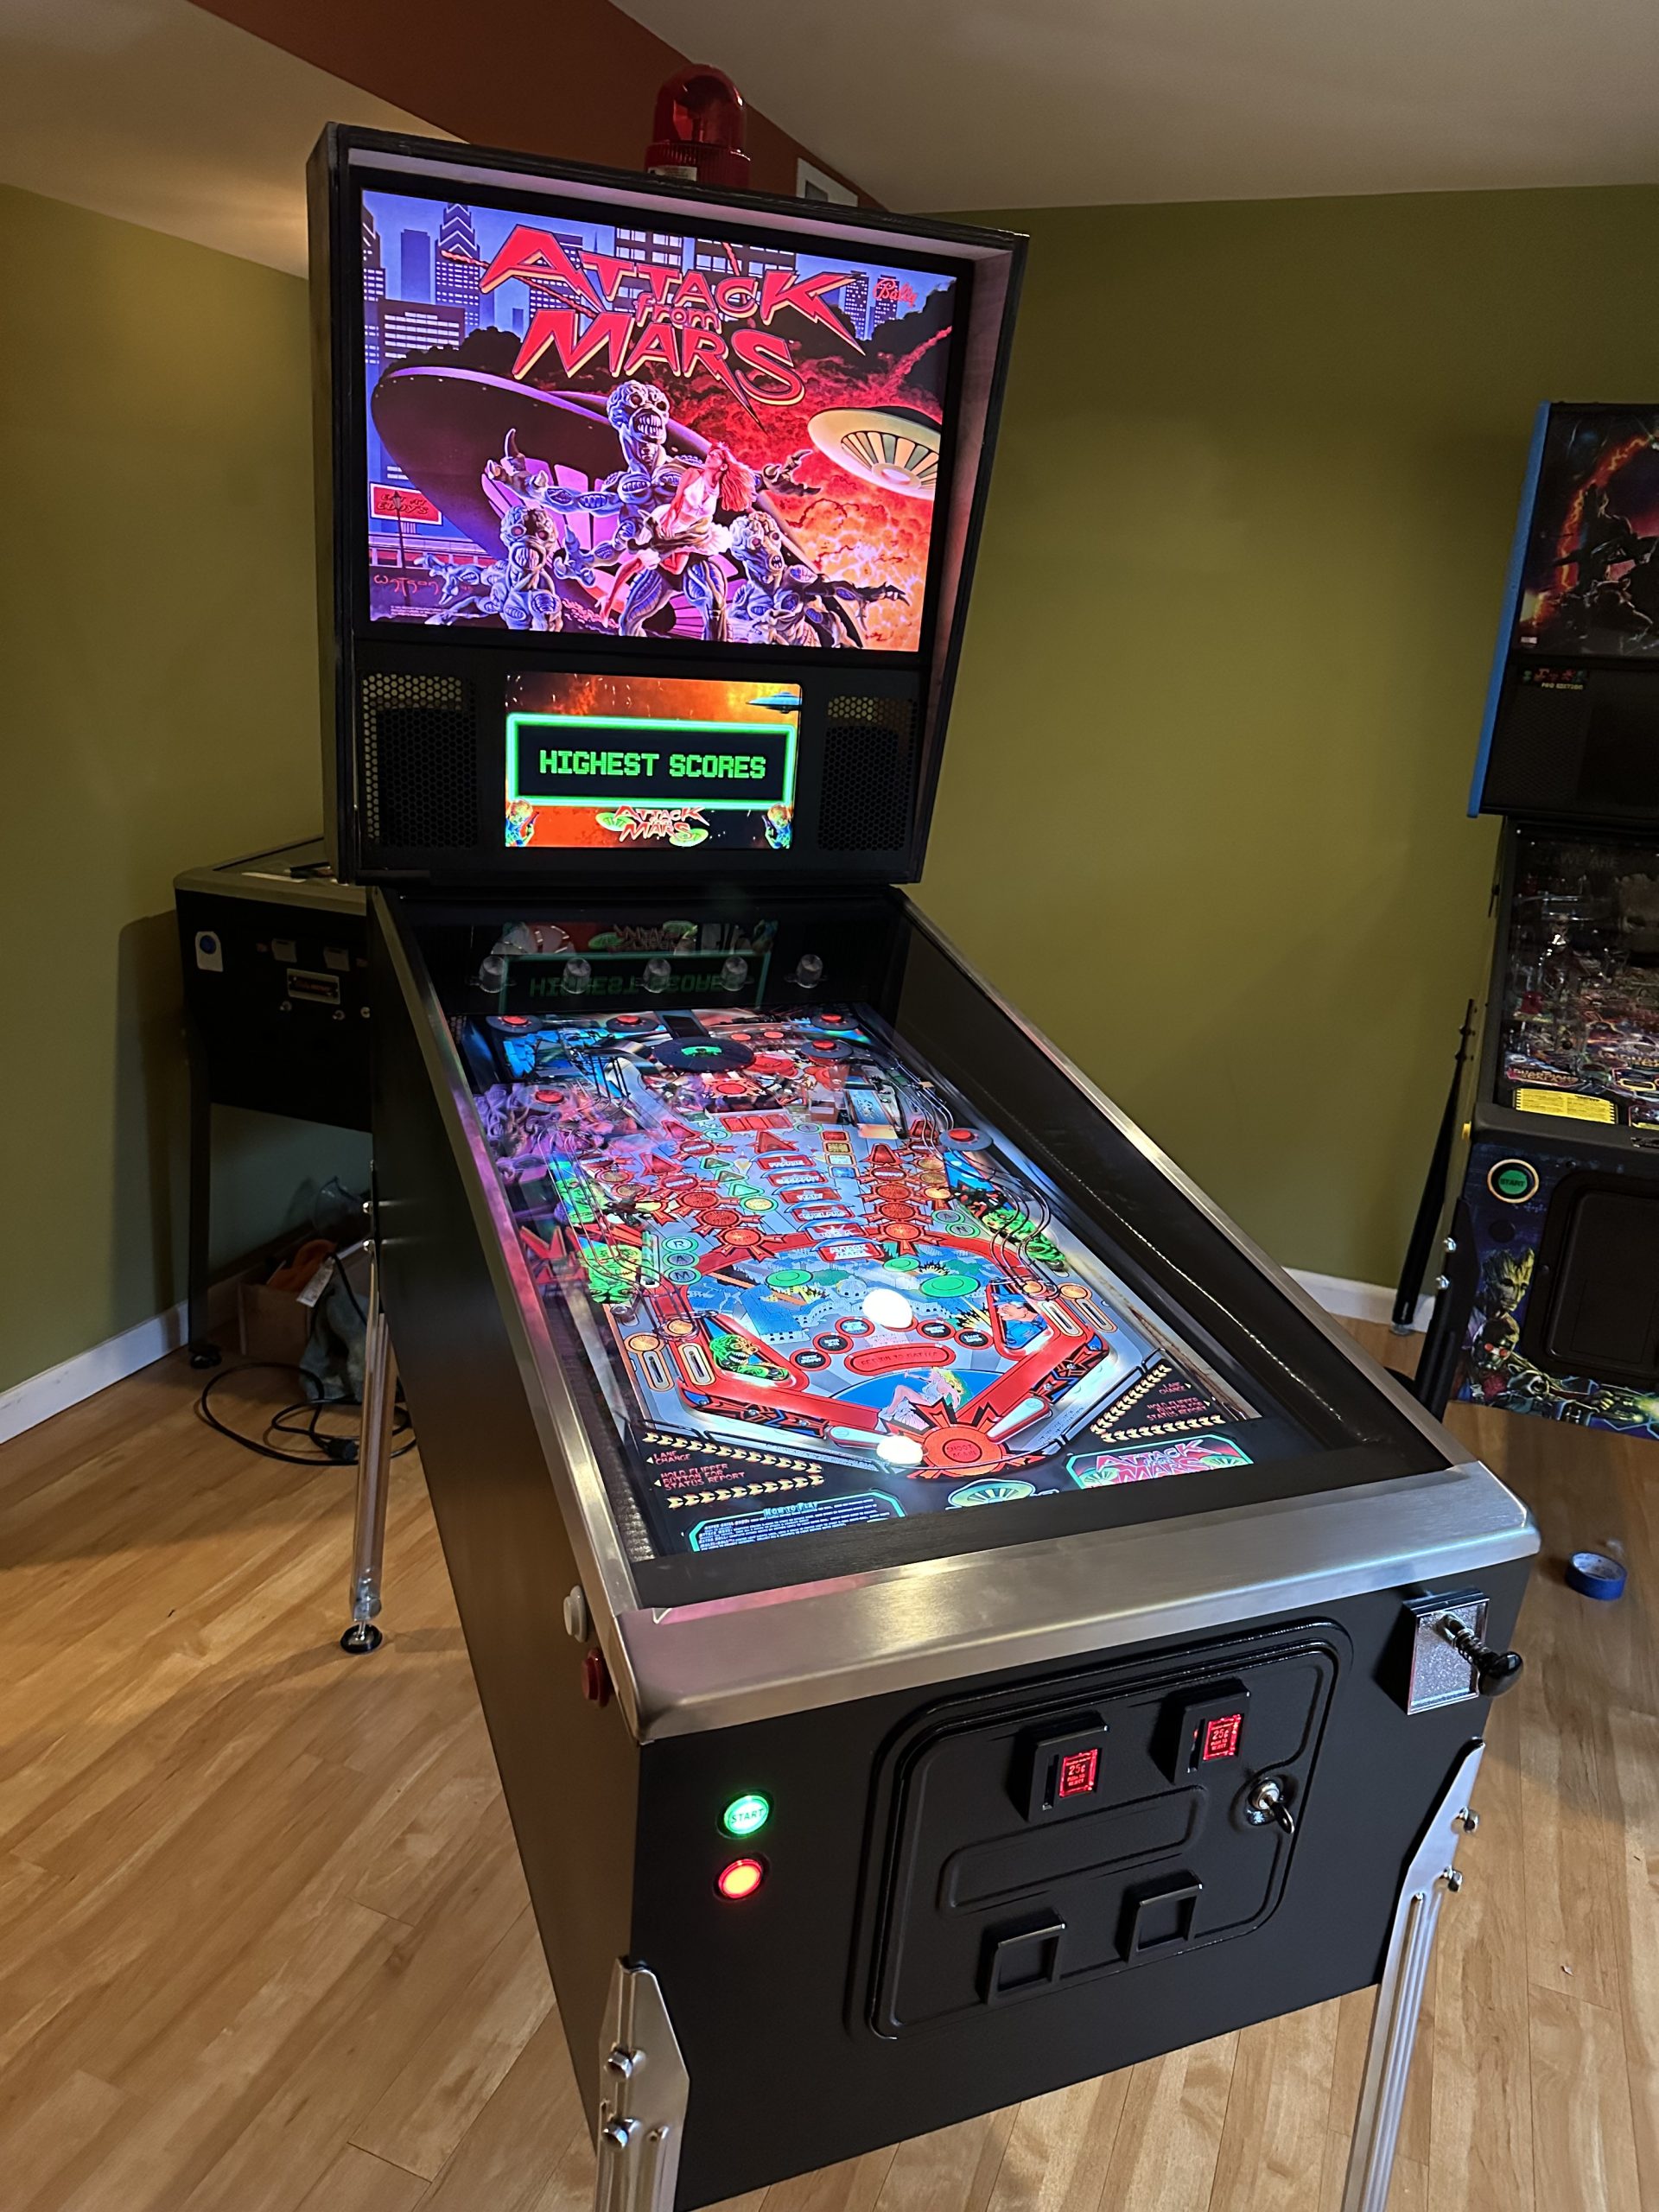
The slippery slope: I started with a plan to not include any “real” mechanical parts in my virtual pinball build and instead rely on six tactile speakers to produce the realistic sound and feel of a real pinball machine. Then I found Cleveland Software, a company that created an easy-to-wire board setup with good solenoids. I got the six-piece kit and loved it. Once you have the basic hardware controller (controlled by DOF, Direct Output Framework), adding more is easy – too easy. Next, I added a shaker motor (a must-have in my book) and bought an old set of Pinbot flipper assemblies from on eBay. I rewired the flippers and they worked well for the “sound” at only 24v.
The real cabinet build involved tedious work, and I played it for several months with no backbox – just monitors stacked on the end of the cabinet. Now, near the end of 2023, I have a real backbox, flasher lights, siren, mechanical parts, and a working plunger. Unfortunately, I still have a long way to go. My next steps include figuring out how to fill the gap between the LG OLED TV and sidewalls, redoing the speaker/monitor cover, taking everything inside OUT and rewiring it properly (it’s currently a rat’s nest). I also need to design/buy decals for the side/front and backbox. I’ve made the cuts for t-molding but haven’t picked the color yet.
I’ve been through so much learning and down many rabbit holes in almost 2 years. I predict it will be another year before it’s finished <cough>.
I recently had a need to write some code for the Kaltura API and the libraries have had a lot of changes since the last time I used them. One thing I found curious was (at least for Java) all API calls are queued making the operation asynchronous. It’s interesting to me that other languages don’t default to this. This may be desirable in some scenarios; however, if you are wanting to take any conditional action, you iI recently had a need to write some code for the Kaltura API, and the libraries have had a lot of changes since the last time I used them. One thing I found curious was that (at least for Java), all API calls are queued, making the operations all asynchronous. It’s interesting to me that other languages don’t default to this. This may be desirable in some scenarios; however, if you are wanting to take any conditional action, you ideally want to wait for the operation to complete. For example, if you want to iterate through the categories and then, depending on the data, take other actions to generate a report, you’re forced to store all the content in memory before processing it. Perhaps you’d prefer to generate your API session ID by logging in rather than using your admin secret, which is highly recommended. The C# examples show all the code using the execute() method with an onComplete method that sets a boolean. The following line after the call does a loop on the boolean with 100 ms of sleep. I’m not sure if the C# API has a queue method; if it does, it seems the developer portal-generated code is wrong and the polling is not required. While I couldn’t find any examples of serial execution of requests in Java, the executor class does have an “execute” method. You just need to massage the code generated by the API tool a bit. It does block until API calls are complete and then returns.
Here is an example of login:
LoginByLoginIdUserBuilder requestBuilder = UserService.loginByLoginId(loginId, password, partnerId, expiry, privileges, otp)
.setCompletion(new OnCompletion<Response<String>>() {
@Override
public void onComplete(Response<String> result) {
System.out.println(result);
}
});
APIOkRequestsExecutor.getExecutor().queue(requestBuilder.build(client));
// proceed to other API interactions
Obviously you need addition controls here (like C# samples) to know when the request is actually complete prior to doing other API actions. You can rewrite this call to block on completion. This simplifies your code if you have nested logic that iterates through a list of items (each which generate an API call).
I think the usage pattern is a lot easier, and the code is much more straightforward.
Unfortunately, it seems the code examples, most of the client API, and documentation for the Kaltura developer portal are all code-generated. This allows them to spend less time supporting them, but honestly, I think using the REST endpoints is easier due to the lack of human-readable documents and proper code examples that are tested.
For many creating a virtual pinball machine is one part woodworking, two parts electronics and wiring, and three parts installing/configuring/ troubleshooting software from several different contributors. One of the core components you’ll want in your setup is the Visual Pinball application. I’ve had great luck with the software, except for one issue with it knowing which monitor to use for which “part” of the “virtual” pinball machine. A common question I saw posted online is: “Why is my Visual Pinball playfield on the backglass or DMD monitor?” or “Why is my backglass not on the monitor I specified?” I noticed it was common because I did a lot of searching for the solution. I’ve attempted to detail some of the options I tried below. If you’ve tried everything with no luck, make sure to read the “Fix the Backglass” and “My Display Fix Script” sections below, as I think they will do the trick!
Fix the Backglass – The Easy Part
Many people aren’t aware that the backglass position problem is pretty easy to fix now. The latest backglass software version lets you put in a pixel position. So, if you have a 4K playfield, simply put the value @3840 to line 5 of your screenres.txt and you’ll never have to deal with that again! Since you put your monitors in a specific order, the coordinate system is much better than using a “display id” that will probably change.
What’s in a Display Number?
Visual Pinball determines a display “number” that’s not the same as the number you see in the control panel settings. If the number it finds for your display changes, VP still uses that number even though the proper monitor to use is now a different number after reboot. The tricks are all about trying to get Visual Pinball to use proper display or getting the number to not change.
Clean up the Registry
One option to try is to delete all the registry keys for your displays. Many people, when building a pinball cabinet, “try out” a few monitors, or upgrade video cards, etc. along the way. This leaves a lot of garbage in the registry. Heck, I had almost 30 entries but only 3 displays (multiple video cards and monitor trials gave me the mess). You can clean it up by deleting all the keys below (backup first, make sure you know how to use regedit). If this is the cause of your trouble, it might fix it, but it didn’t for me.
Oh, who wants to do this? Nobody, but if it will make it “just work” you might be happy with this approach. The idea is to make sure all your displays are on BEFORE the PC is turned on. This makes a lot of sense if you’ve seen a fast PC boot it might be at the login process before all your monitors are ready for a signal. I’m pretty sure every time a boot up the login screen starts on a different monitor before settling on my primary display. Some people swear by this method, but it didn’t work for me. I didn’t really want it to work, I’m using a smart power strip and just want one magic on button!
Use NailBuster utility to set Display at startup
Another trick is a utility that looks at what display is currently setup at coordinates 1,1 and set the registry entry used by Virtual Pinball to match. This was the first solution that seemed to work, but not 100% of the time. You can give it a try and see if works 100% for you.
Use the “primary” flag at the startup of Visual Pinball (try this!)
I initially saw a flag browsing the repo for monitor setup and then, after trying it as “/primary”, found a post on Facebook from Nailbuster on the feature being part of 10.7 and to use “-Primary”. I changed the registry for vpx to use the “wrong” monitor and it worked. Even with vpx settings pointing to my DMD, it uses my main primary monitor properly! However, there are some caveats: this requires 10.7 and only works for Visual Pinball. Further testing with reboots showed sometimes even with vpx working with “right” monitor using this flag at startup actually forced my playfield to the wrong display. I think it’s worth a try to see if it helps (especially given the person who created it).
What works 100% of the time for me?
We could title this section “Your mileage may vary”. I took a brief look at the github repo (emphasis on brief – my observations are just a guess). It seems to be using Win32 calls to GetMonitorInfo and MonitorFromWindow to create a list, and using the display number according to the order of that list. It doesn’t check that information (and update it) at runtime, so if the ordering of items changes, it uses the same display number despite the change. When this happens, if you look at video preferences in VPX, you’ll see it puts an asterisk in the UI next to the “right” one.
Since my problem occurred every dozen or so starts, I tried a few scripts to list the displays to see if I could find one that always matched the ordering (and numbers) that matched the order Virtual Pinball used. What I found was that if you used the output from the Direct X Diagnostic tool, it always gave me the same order.
My Display Fix Script
I created a batch script that uses command line options to output the Direct X diagnostic tool, find the display listings, pick a display based on a unique resolution or display frequency, and update the registry entry Visual Pinball uses to match. Since most cabinet builds have a 4K display or a high refresh rate display, that can be used to identify which screen should be the “playfield”. This script could also be updated for use with Future Pinball (have some lines still testing in script). If all your displays are the same I’ve added support for that too, just read the readme in the zip file.
I created a zip file with a few scripts to pick from. I know a lot of builders aren’t PC experts, so I created some variations of the script with specific parameters so you can just drag and drop without setting command line parameters. You figured out that slot cutter on the router for that fancy t-molding. Let’s make this easy. Just copy the one you want (pick4kdisplay.bat for most) to your startup folder and reboot. You should see a command window pop-up after reboot pause for 5 seconds, then update the right settings. You don’t want to launch other things until this is done so if you have a delay in PinballY or Popper bump it up by several seconds (but you may not need this if takes you several seconds to pick a game!). Click here to download my zip of the batch scripts.
Virtual pinball refers to playing pinball games using software without a physical ball rolling around inside a pinball cabinet.
Virtual pinball could be a game on your phone
Virtual pinball might be playing Pinball FX2 on your Quest VR headset
Virtual pinball could be a gaming PC running pinball simulation software inside a real pinball cabinet with real flippers, slings, and pop bumpers!
Years ago, I started playing on my PC but gave it up as it wasn’t much like playing real pinball. After watching some YouTube videos on software called “Virtual Pinball” (VPX), I decided to grab a cheap gaming PC and try it. I found a $200 Acer Nitro with a 1650 card that was “good enough” for playing 4K at 60fps. It was great, so I immediately grabbed an old keyboard encoder from the “junk drawer” and cobbled together this setup.
First Prototype with my Computer Monitor Rotated
I was hooked. Eight days later, I had a 4K TV laying flat on a table with a slightly nicer wood box with flipper buttons on it.
TV Prototype
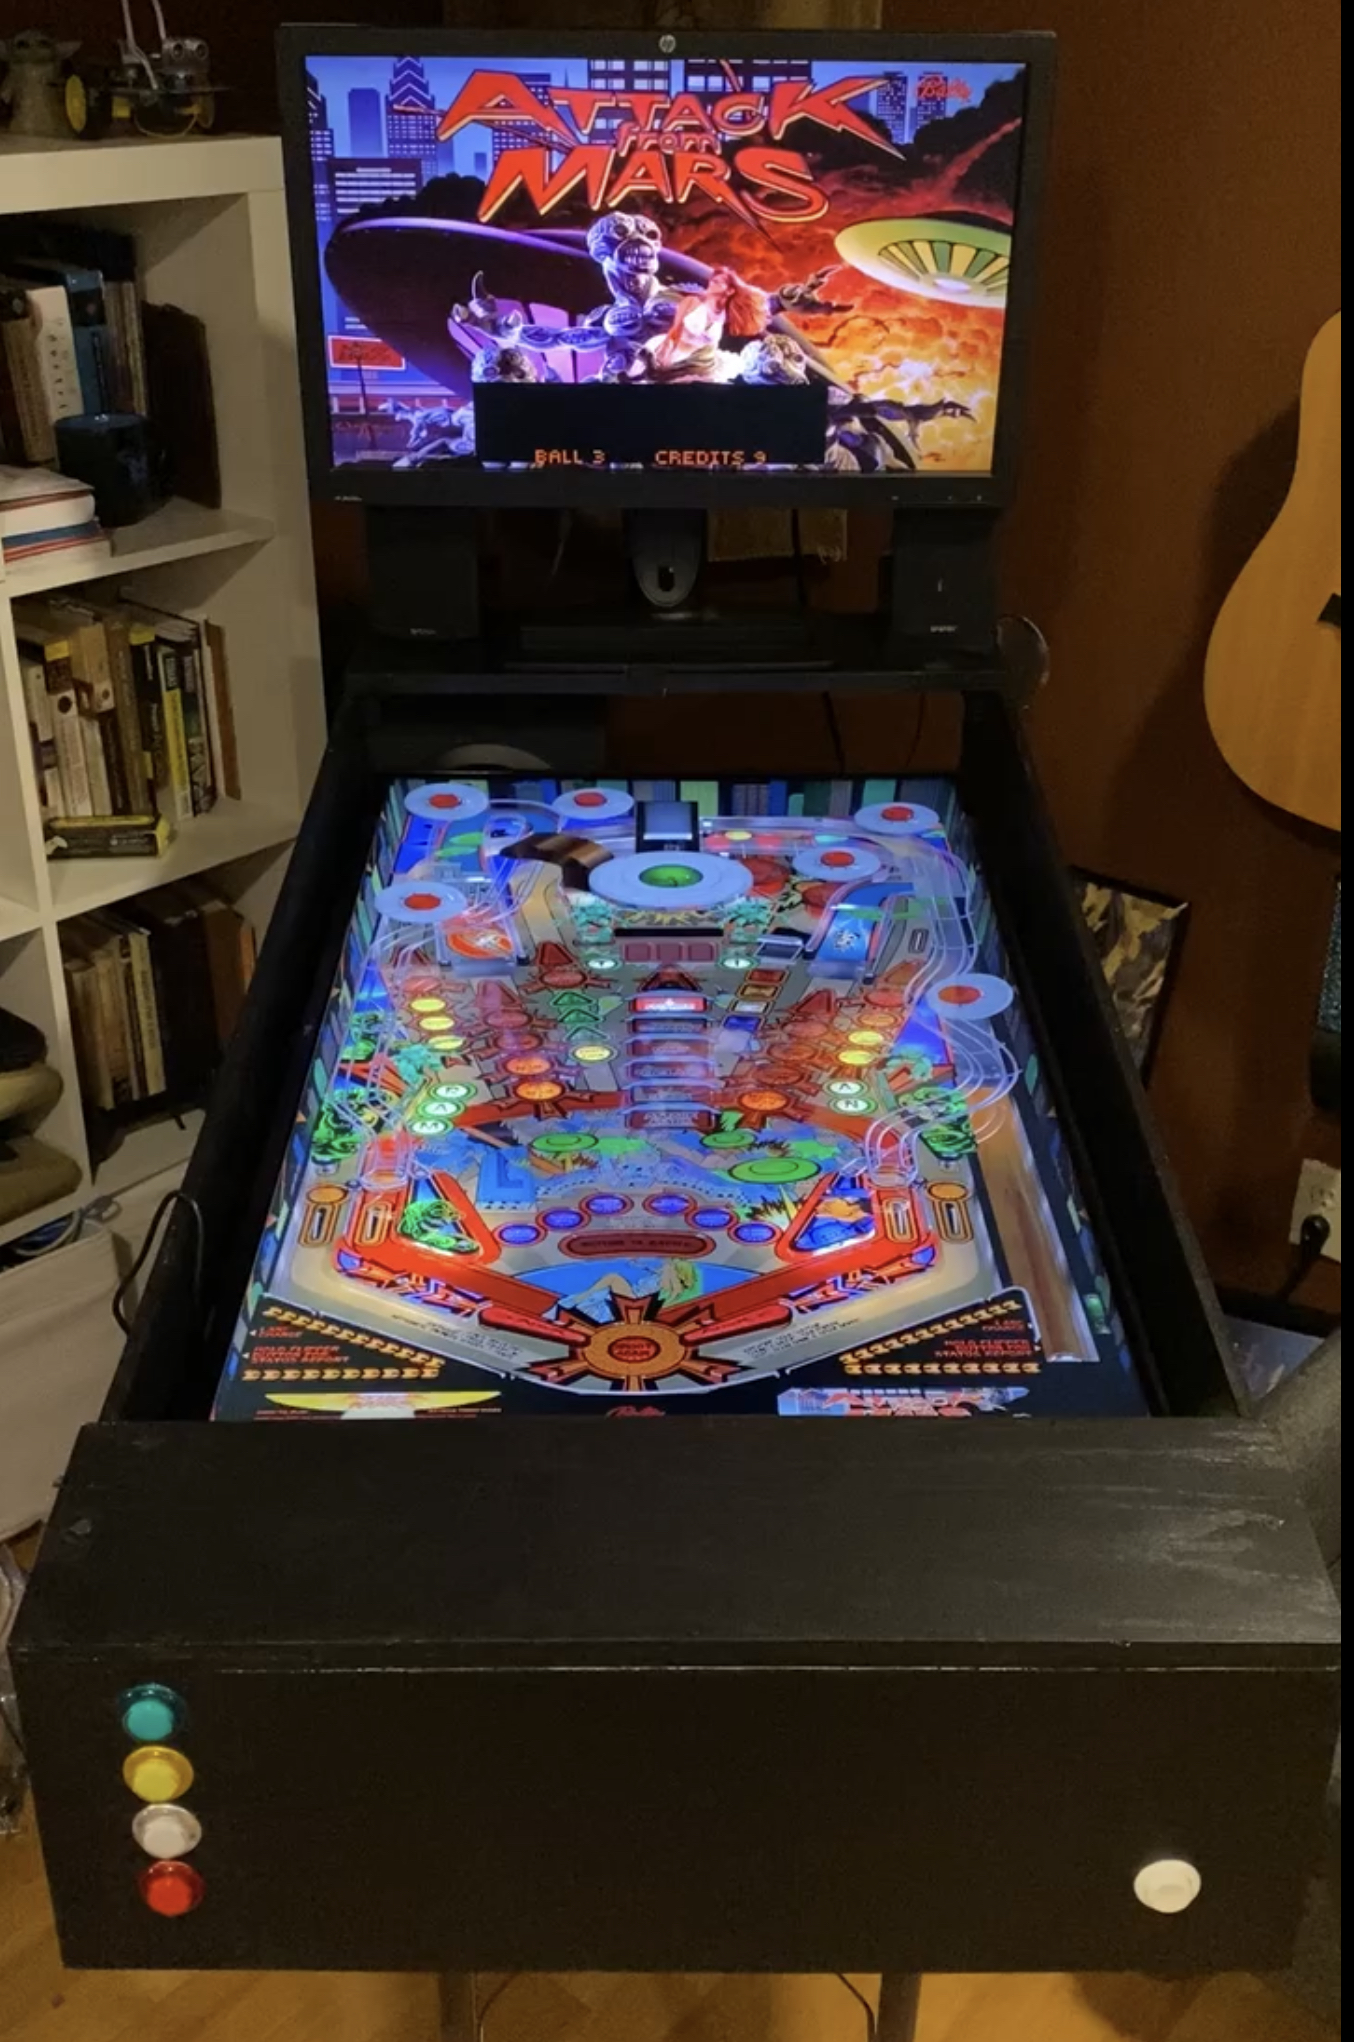
A week later I was adding Surround Sound Feedback (SSF) which are small speakers placed under the TV at the points where you’d expect the sound. So flipper sounds come from the front, the ball rolling sounds follow placement on the screen, etc. But to really try this I wanted the small percussive speakers that you could feel – which required another prototype – a box. So two weeks later I built this and rigged a monitor on top and have the speakers mounted on inside with 2.1 amps.
Box with Tactile Speakers
Unfortunately, this is pretty fun to play as is, so hopefully I don’t get stuck at the prototype stage! I’d like to experiment with a real DMD or use an old monitor screen from the “junk cabinet”. It’s ugly but pretty fun and has come a long way in less than 4 weeks! My ultimate goal is to have a normal wide-body pinball cabinet to put all this in. Hopefully goes faster than the Pac-Man machine …
I recently created a network proxy for the FlashPrint software, which makes remote printing via Wi-Fi possible with the PowerSpec printer. While debugging that setup, I was able to observe the exact protocol and undocumented gcode commands used to send a file to the printer for printing. FlashForge doesn’t “stream” a print like many support with a tool like Octopi. Instead, a set of gcode commands are sent to the printer and then saved to the printer’s memory. Finally, then print begins. Since I can’t use Octopi with the FlashForge proprietary gcode, I needed something else.
Automation Option
The first goal was to enable automation for using another slicer. I created a set of Python functions to send a file to the printer. From there, I had what I needed to setup an Automater script on my Mac. This script monitors files in a directory and when one appears, it invokes the script with the filename. The trigger is files or folders added to /documents/start3dprint. The action is to run the shell script, passing my printer’s IP, port, and filename. This has worked well to start printing directly from Simplify3D
Print Monitoring
I also wanted an easy way to keep a window up in the corner of screen with print status. For this I created a simple Python GUI to connect to printer for monitoring and/or send a file. This can be used in conjunction with the automation to monitor print progress. I was able to compile it into a windows executable and Mac .dmg file. I was surprised how well the UI toolkit and compilation worked.
I hope after some more testing I’ll feel comfortable releasing it to others to try.
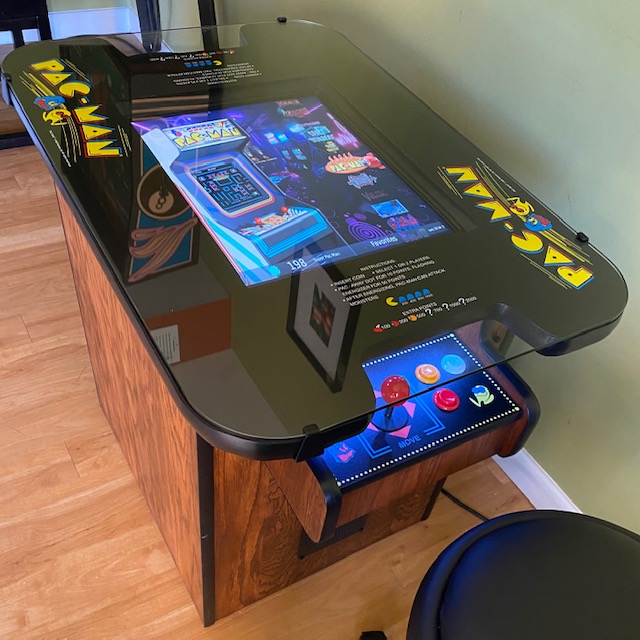
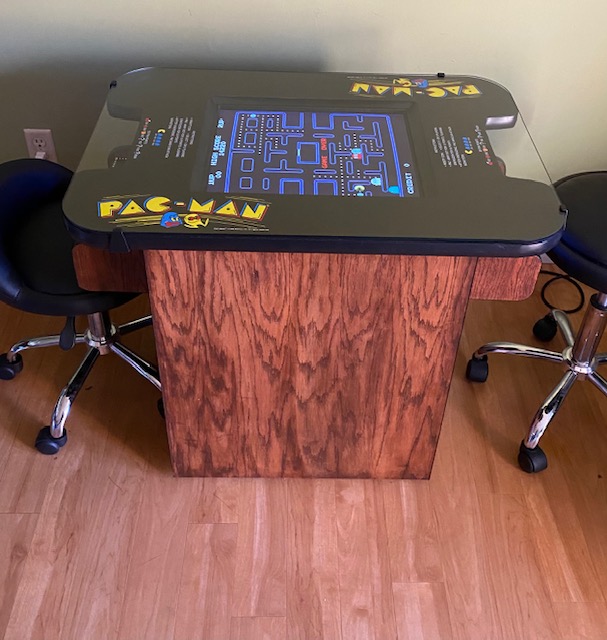
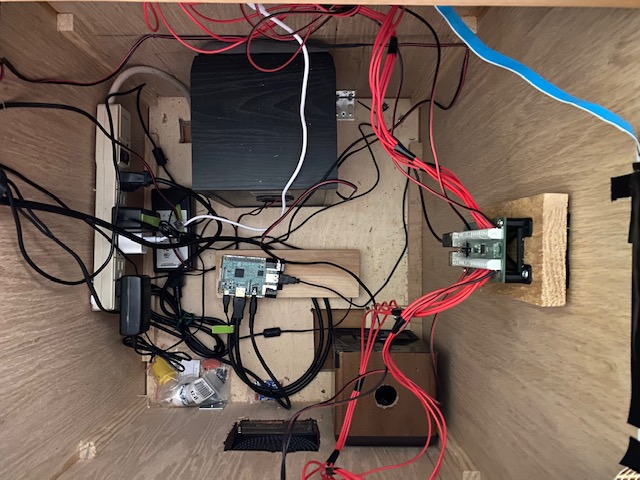
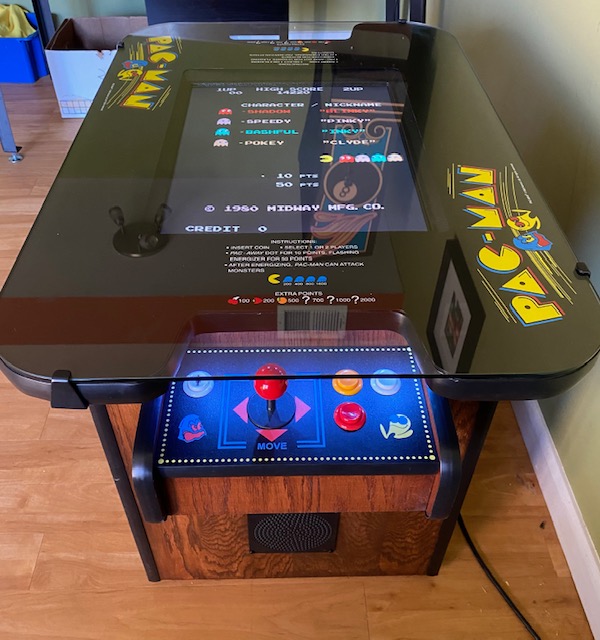
Did it take a pandemic to slow things down a little and find time to polish off the Pac-man project? Nah, I’m sure it is a coincidence. The final part of the build was getting the control panels designed with custom vinyl graphics and mounted the way I wanted (easy to remove). The very last thingI had trouble deciding on this small panel if I wanted to keep the “player 1” and “player 2” buttons on the one side or split them. I decided to just design a graphic that could do either and ordered it. The custom design is really modeled after the original, but with some tweaks to allow for extra buttons. The number of buttons was the last thing I wondered about. Even if you look at all the potential games out there, very few use more than two buttons—and most of what I wanted to play was two or less—so of course I picked three! It’s been a long journey from buying the two original arcade boards and a large CRT monitor to the final solution of a Raspberry Pi with an LCD panel. I’m pretty happy with the results. Below is a summary of the build and some of the “fun items.”
Easy to remove top, no swing out hinge.
Custom design but very close to the original (read as “figured it out as I went”).
All furniture grade plywood stained and finished with wipe-on poly
LCD bezel is paired with faux screen curvature and scan lines to emulate a CRT.
Custom system image for Raspberry 3b, compiled and configured components I wanted. Using Mame emulator and hyperspin front end.
All buttons/joysticks wired into iPac2 interface allowing simultaneous play.
Custom graphics on control panels (thanks to help from my youngest son who is pictured in another build picture when was far younger!)
3D Design and Printed Items
Slim hidden volume control knob
Base plate joystick restrictor to switch 4/8 way from below panel
Custom glass clips
Interior clips and mounts
Speaker covers
It was a lot of fun. It probably didn’t need to take more than a year or two, but I collected things little by little and went down a lot of rabbit holes. If I had just done a replica and ordered most of the parts (like those darn control panels), it would have been easy, but it’s nice to have something you created on your own. Now I just need COVID to go away so I can have friends over to do head-to-head pac-man! Next project will probably be a Defender cabinet or a Virtual Pinball
I recently had a milestone birthday and took a vacation day to do something fun. Nobody was home all day, so I could work without interruption. I hit Menards to grab a sheet of nice plywood and get the basic pieces for the final machine started.
For the top, I used two sheets of plywood glued together to create a 1″ top, which is the standard height. This is needed for the traditional t-molding but also for the proper height for the clips, which need 1″ at the top plus the height of the glass. This plywood was going to be covered by the top graphic, molding, etc., so it wasn’t a nice grade-just something that was very flat so the two pieces would stay together well. I used wood screws after gluing to ensure a good bond (which I removed prior to cutting out the hole for the monitor and the contours for the design).
The top was a challenge to cut out. I traced the glass onto the wood and used a circular saw to make a nice “square” and then used jigsaw to make the curve and interior cuts. I wasn’t real happy with my initial cuts as the jigsaw blade isn’t really great for 1″ no matter how slow you go. I used some rasps/files to get it to get it “good enough”. Most of the edges and top is covered by graphics and molding.
For the base, it’s essentially a box. Normally I’d just wood glue, nail, and clamp, but since I’d be adding t-molding I couldn’t use nails, so I used corner blocks, which helped keep everything square and I could nail in those to the face board and miss the edges.
I used a strap to let everything set and tested the router on some scrap for t-molding. Given how wide the bit is for this, you really need a variable speed router to do this safely (and use the lower speeds). For whatever reason, this step seemed like a hard one. I spent a lot of time thinking about it, I’m sure I spent a lot more time thinking than doing. I’ll be generous to myself and say it was all that thinking that paid off, but in reality, I think the routing part just wasn’t that hard.
It wasn’t a “lot” of time to do all this, as often in life it’s about making the time to get something done! I’m pretty happy with how this turned out overall and look forward to the next steps. Hopefully, the next steps aren’t going to require another milestone birthday.