Great Java - Caffeinated Babblings!

  • Home
  • Coffee Brewing HOW-TO
  • General
  • Web
  • Coffee
  • Java
  • Social Media
  • Coding
Caffeinated Babblings!

pac-man

Pac-Man Machine Done!

December 6, 2020 by Mark

IMG_2087IMG_2092

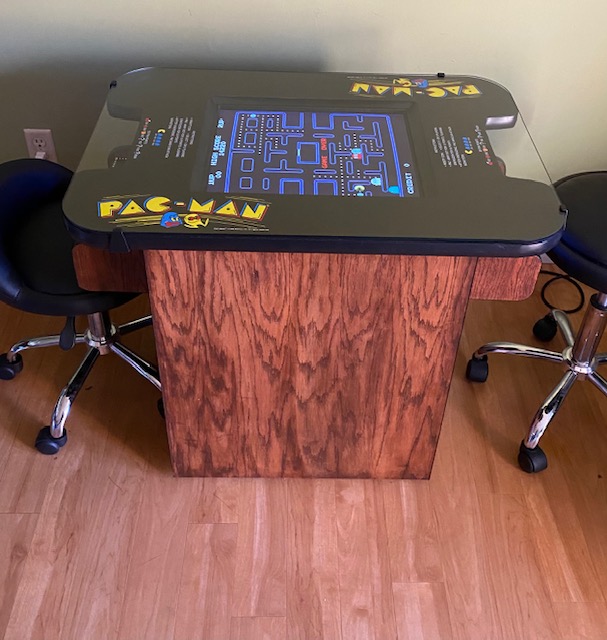
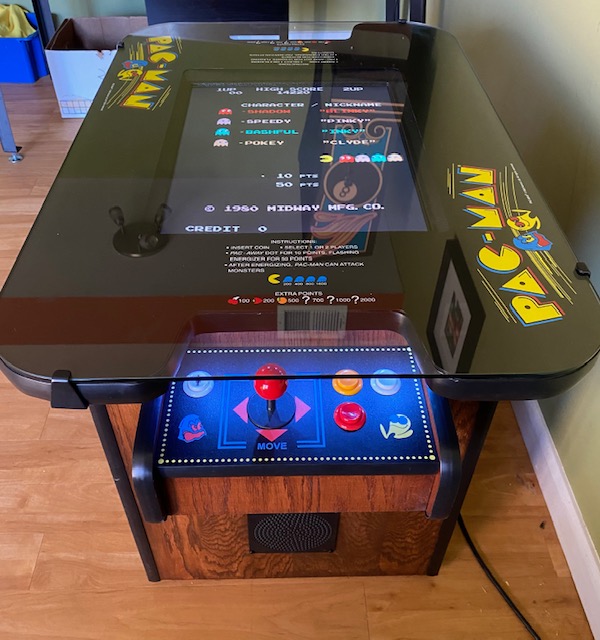
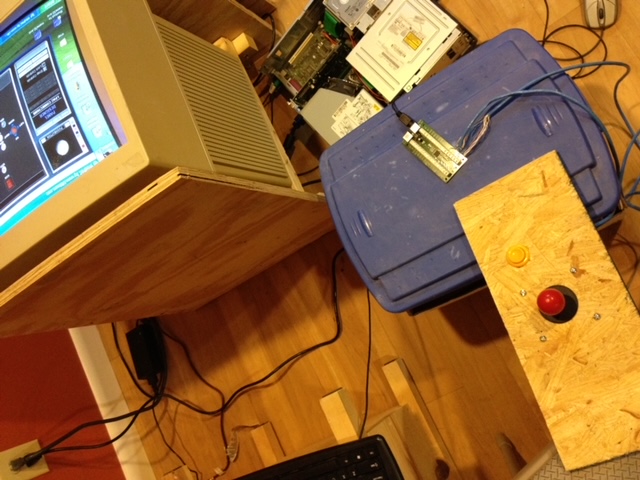
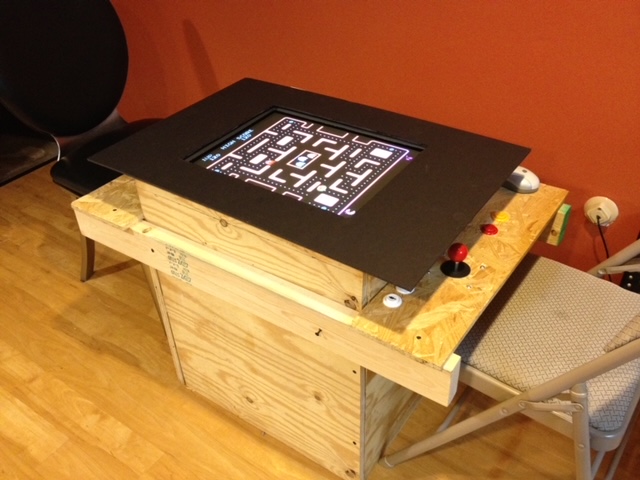
Did it take a pandemic to slow things down a little and find time to polish off the Pac-man project? Nah, I’m sure it is a coincidence. The final part of the build was getting the control panels designed with custom vinyl graphics and mounted the way I wanted (easy to remove). The very last thingI had trouble deciding on this small panel if I wanted to keep the “player 1” and “player 2” buttons on the one side or split them. I decided to just design a graphic that could do either and ordered it. The custom design is really modeled after the original, but with some tweaks to allow for extra buttons. The number of buttons was the last thing I wondered about. Even if you look at all the potential games out there, very few use more than two buttons—and most of what I wanted to play was two or less—so of course I picked three! It’s been a long journey from buying the two original arcade boards and a large CRT monitor to the final solution of a Raspberry Pi with an LCD panel. I’m pretty happy with the results. Below is a summary of the build and some of the “fun items.”

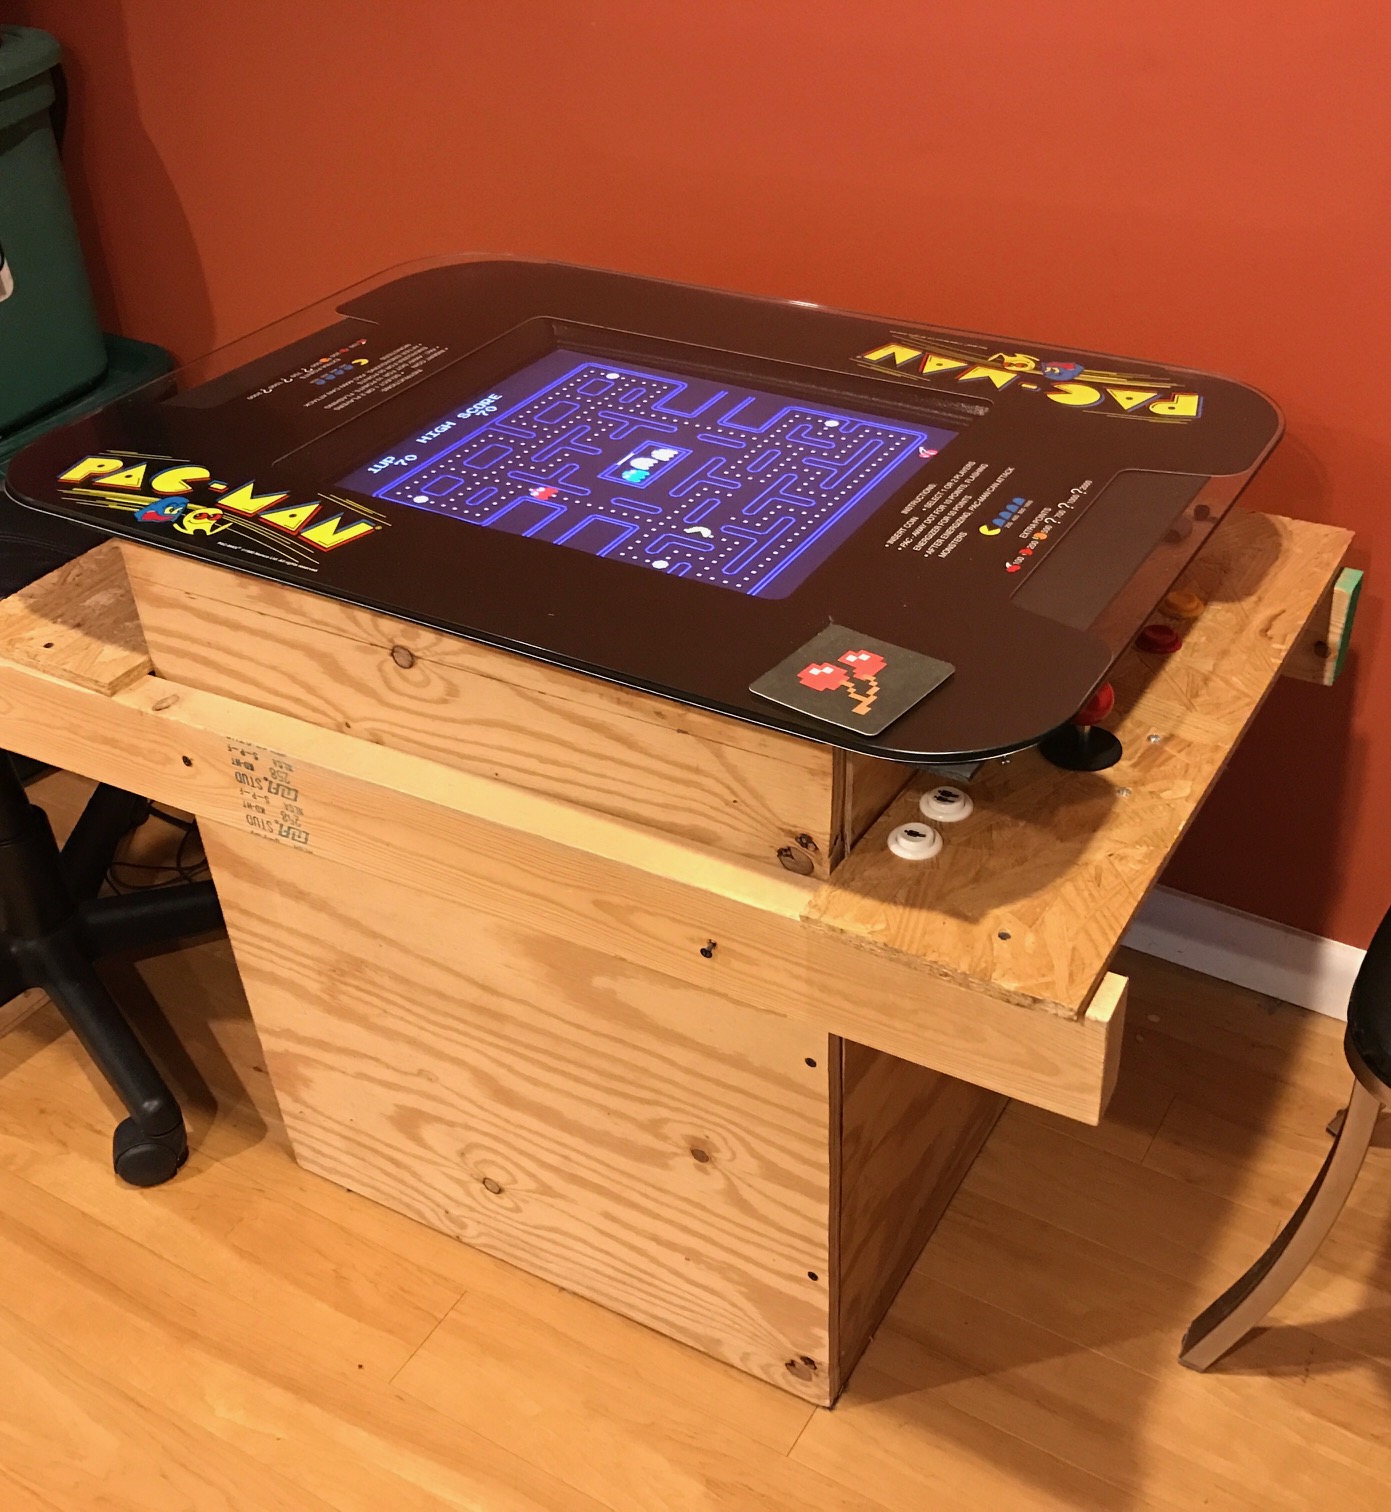
  • Easy to remove top, no swing out hinge.
  • Custom design but very close to the original (read as “figured it out as I went”).
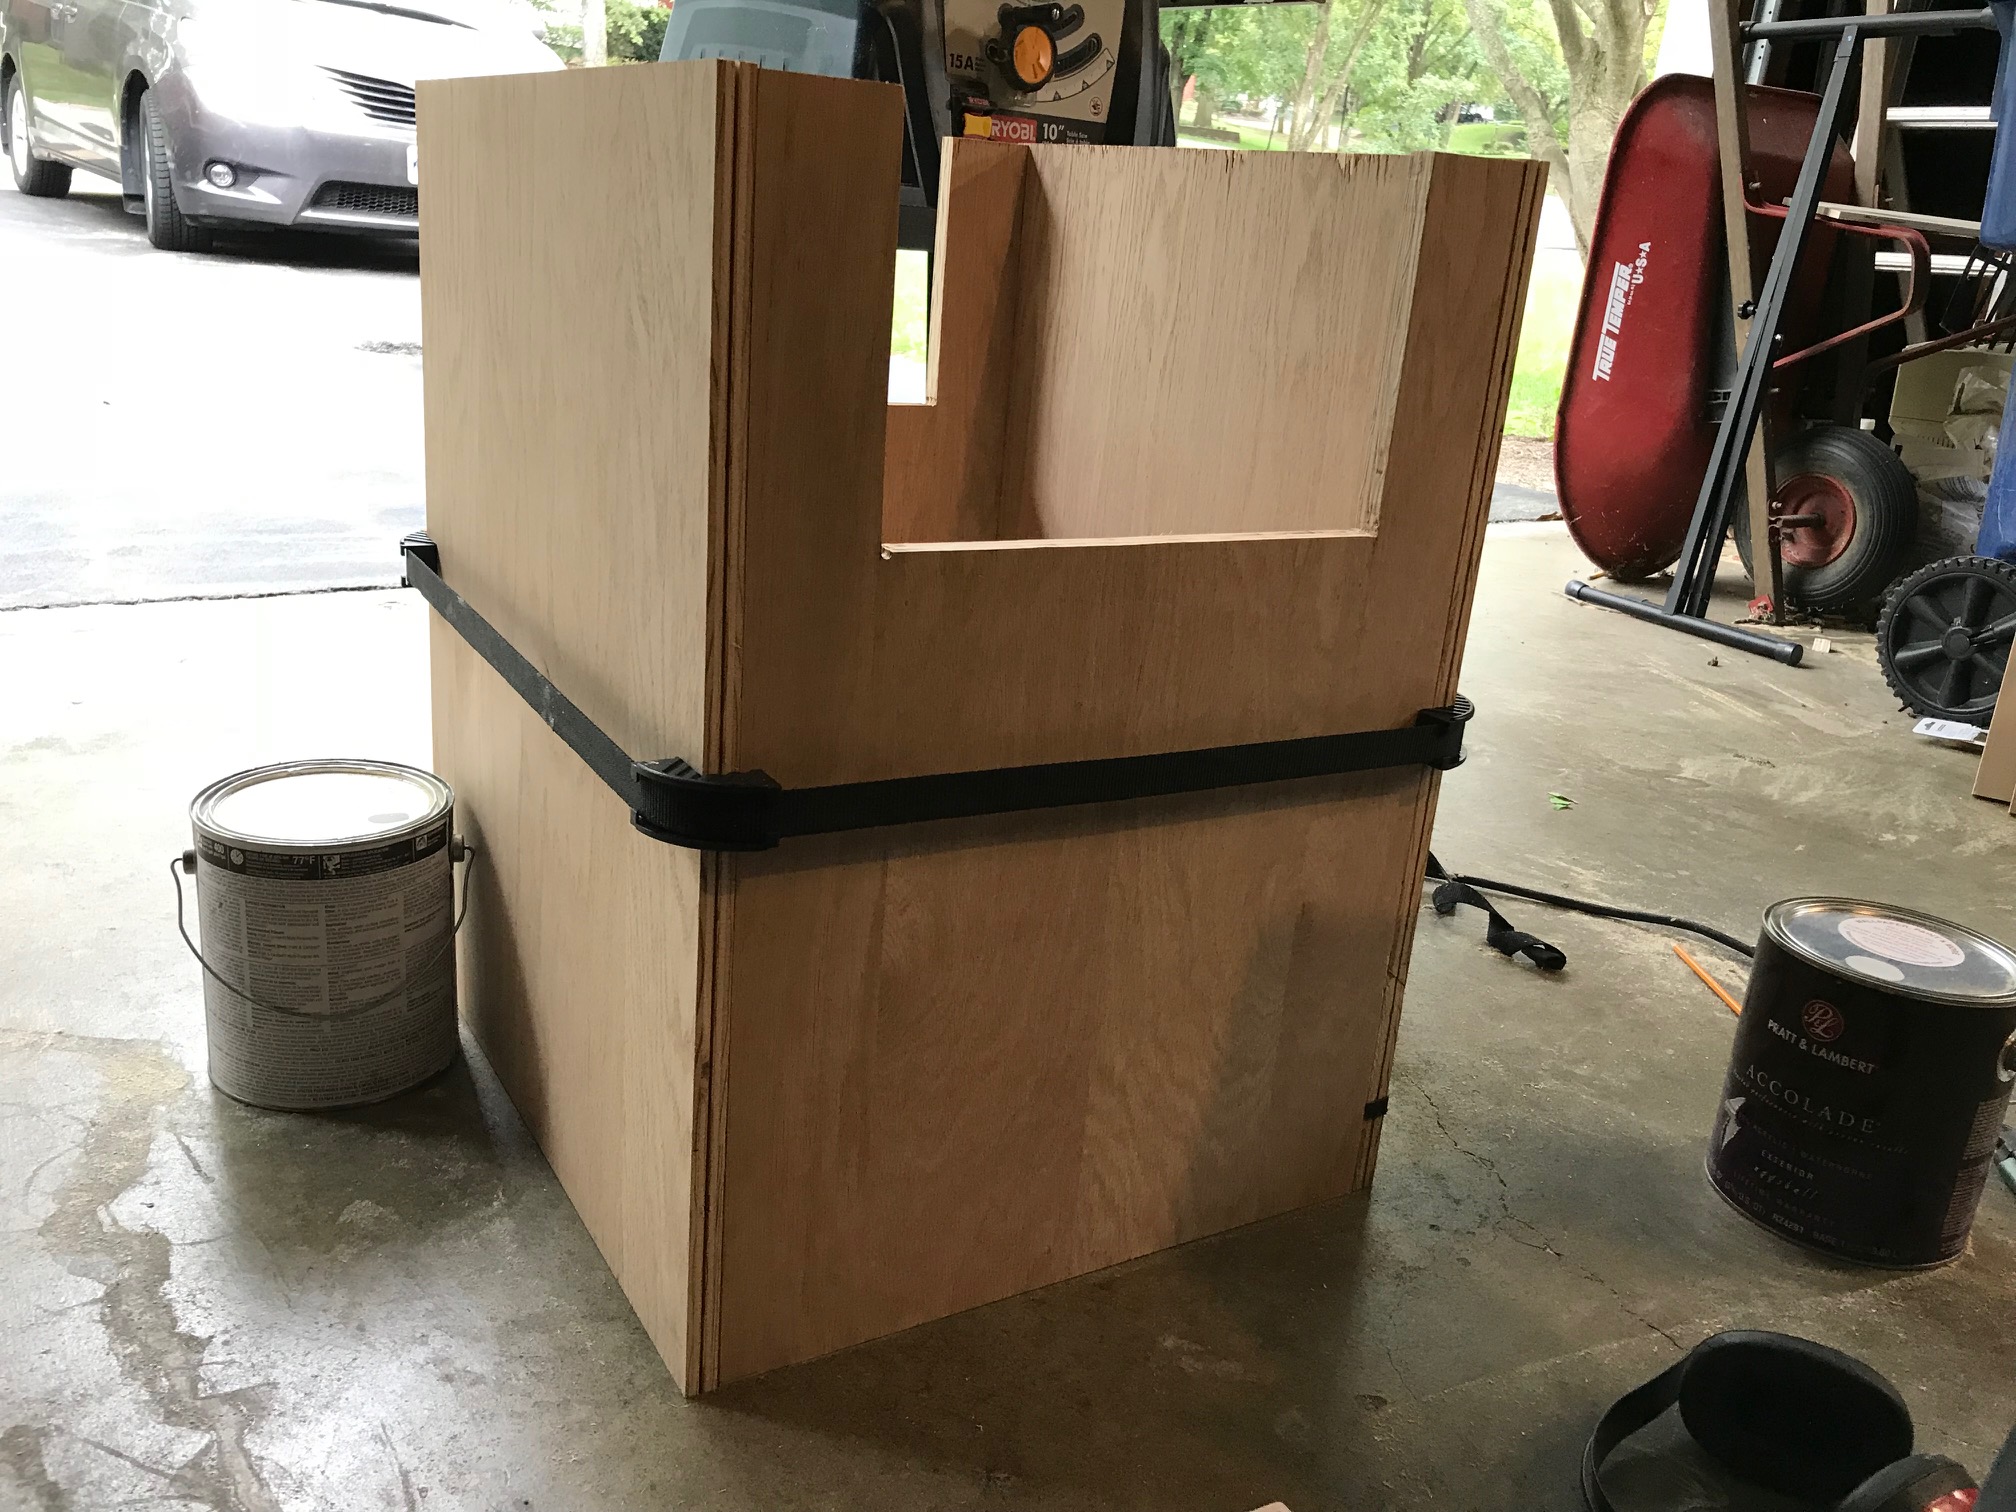
  • All furniture grade plywood stained and finished with wipe-on poly
  • LCD bezel is paired with faux screen curvature and scan lines to emulate a CRT.
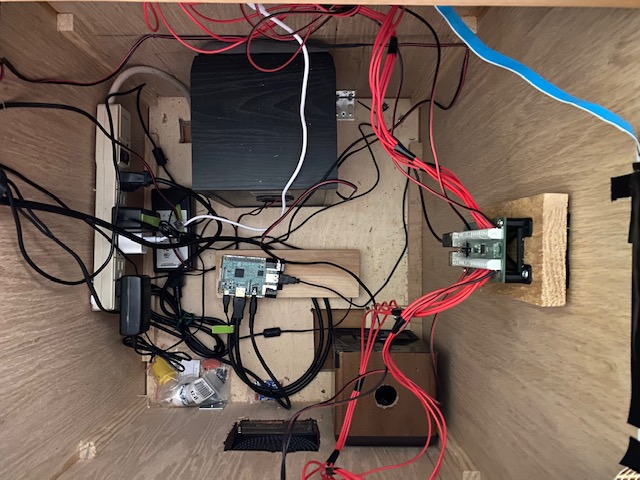
  • Custom system image for Raspberry 3b, compiled and configured components I wanted. Using Mame emulator and hyperspin front end.
  • All buttons/joysticks wired into iPac2 interface allowing simultaneous play.
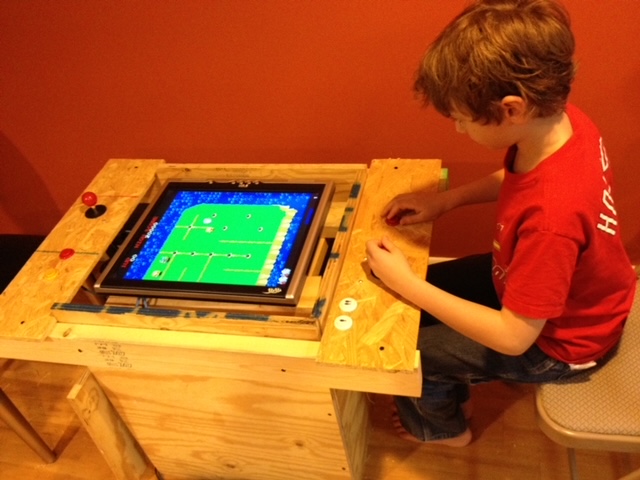
  • Custom graphics on control panels (thanks to help from my youngest son who is pictured in another build picture when was far younger!)
  • 3D Design and Printed Items
    • Slim hidden volume control knob
    • Base plate joystick restrictor to switch 4/8 way from below panel
    • Custom glass clips
    • Interior clips and mounts
    • Speaker covers

It was a lot of fun. It probably didn’t need to take more than a year or two, but I collected things little by little and went down a lot of rabbit holes. If I had just done a replica and ordered most of the parts (like those darn control panels), it would have been easy, but it’s nice to have something you created on your own. Now I just need COVID to go away so I can have friends over to do head-to-head pac-man! Next project will probably be a Defender cabinet or a Virtual Pinball

Check out other build posts tagged “pac-man” for pics of the journey.

IMG_2399IMG_2089

Posted in: General Tagged: arcade, emulation, pac-man

Pac-Man Has a Box and Real Top!

October 18, 2018 by Mark

I recently had a milestone birthday and took a vacation day to do something fun. Nobody was home all day, so I could work without interruption. I hit Menards to grab a sheet of nice plywood and get the basic pieces for the final machine started.

For the top, I used two sheets of plywood glued together to create a 1″ top, which is the standard height. This is needed for the traditional t-molding but also for the proper height for the clips, which need 1″ at the top plus the height of the glass. This plywood was going to be covered by the top graphic, molding, etc., so it wasn’t a nice grade-just something that was very flat so the two pieces would stay together well. I used wood screws after gluing to ensure a good bond (which I removed prior to cutting out the hole for the monitor and the contours for the design).

The top was a challenge to cut out. I traced the glass onto the wood and used a circular saw to make a nice “square” and then used jigsaw to make the curve and interior cuts. I wasn’t real happy with my initial cuts as the jigsaw blade isn’t really great for 1″ no matter how slow you go. I used some rasps/files to get it to get it “good enough”. Most of the edges and top is covered by graphics and molding.

For the base, it’s essentially a box. Normally I’d just wood glue, nail, and clamp, but since I’d be adding t-molding I couldn’t use nails, so I used corner blocks, which helped keep everything square and I could nail in those to the face board and miss the edges.

I used a strap to let everything set and tested the router on some scrap for t-molding. Given how wide the bit is for this, you really need a variable speed router to do this safely (and use the lower speeds). For whatever reason, this step seemed like a hard one. I spent a lot of time thinking about it, I’m sure I spent a lot more time thinking than doing. I’ll be generous to myself and say it was all that thinking that paid off, but in reality, I think the routing part just wasn’t that hard.

It wasn’t a “lot” of time to do all this, as often in life it’s about making the time to get something done! I’m pretty happy with how this turned out overall and look forward to the next steps. Hopefully, the next steps aren’t going to require another milestone birthday.

Posted in: General Tagged: pac-man

Pac-Man has some Class … and Glass!

January 3, 2017 by Mark

IMG_0386I’ve had my authentic Pac-Man underlay replacement graphic for a couple years (stored in a safe place away from kids), but finally got some glass and am ready to move this project forward a bit! I have to say, when you are playing it, you can’t see it is all “prototype” and it feels pretty legit. I also got a bezel designed for an LCD screen, and it really works well. Unfortunately, the next step is a big one: building the final cabinet. I’ve been reading about using a wood laminate like the original machines, but really would prefer to use a nicer wood that I can stain. Honestly, since I’ve not done a laminate, it might be easier, but I’m not sure if I want to go “replica” or do it “my way”. It’s probably going to be the latter.

I’ve looked at a lot of custom cocktail machines, and there are a lot of ways to approach the control panels. My prototype looks dumb, but it’s so easy to just box it out. The real reason not to have a control panel the width of the cabinet is that you’d have to sit back farther. With the prototype, you can kind of sneak your knees under it, but when it’s all buttoned up, you will want your knees to the side. Well, that’s a problem for next year (hopefully not next year but based on my timeline so far…)


Posted in: General Tagged: pac-man

Cocktail Machine Prototype

February 27, 2012 by Mark

IMG_2415I finally decided on a cocktail machine versus a stand-up machine. My motivation? My wife thinks it will take up less space. But seriously, it probably will and it’s what I spent many years playing in restaurants and bowling alleys. Pac-Man, Galaga, or Space Invaders? I’m not sure of the theme. I have a couple of working arcade boards but am leaning toward emulation if it has the right feel. In the pictures, I am using a PC. I initially tried to use a nice PC monitor, but it’s so big it would take up the entire box (literally)! I fitted it with an LCD for now to evaluate my options (decase, real arcade monitor, etc). An LCD could work, but you miss that curvature of the screen, so I’m not sure how I feel about that. Also, I’d need some kind of better bevel around the screen, but for now we have black cardboard! You can see my youngest trying it out. I think he likes it.

The next step is probably to decide on a theme and get the underlayment and piece of glass to match. I think it would be easiest to cut the wood top after I have all that. For now, I’ll just keep prototyping as there are a lot of details to figure out.

IMG_2454 IMG_2425

Posted in: General Tagged: pac-man

Copyright © 2025 Great Java - Caffeinated Babblings!.

Taste WordPress Theme by ThemeTaste